|
Table of Contents
Using L3DT with Blender
This tutorial is now obsolete. To export to Blender in L3DT v2.9 build 26 or later, use the 'File→Export→Export optimised mesh' menu option (see user guide). With this option you can export the terrain mesh and texture as a COLLADA '.dae' file, which can be then imported into Blender with no further work.
1. Getting the software
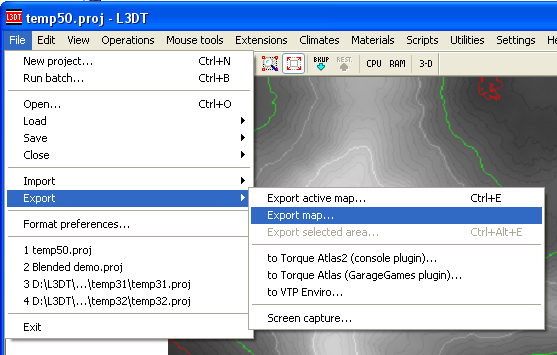
2. Generating the map in L3DTIf you don't know how to generate a map in L3DT, I recommend you use the 'walk-through guide', which is activated by using the 'Help→Walk-through guide' menu option. Alternatively, more adventurous users may wish to follow the designing a fjord tutorial. If you have any questions about how to generate maps in L3DT, please use the help and support forum. 3. Exporting the heightfield from L3DTSelect 'File→Export map' in the menu:
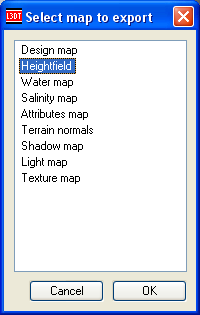
In the 'select map' dialog box, select 'Heightfield':
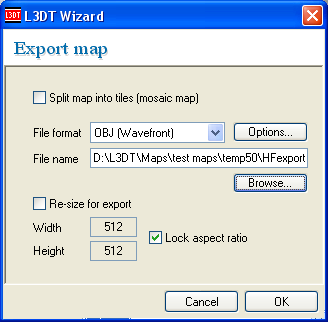
In the 'export map' wizard, select the 'OBJ (wavefront)' format, and enter your filename (or use the 'browse' button):
Click OK and the heightmap will be exported. 4. Inverting the texture map
To use this section of the tutorial, you will need L3DT version 2.5.3.11 or later, which was released on the 20th of April 2008. Earlier versions may not be able to invert the texture properly. If this affects you, I suggest you either update to the latest version, or export the texture and invert it in another image program.
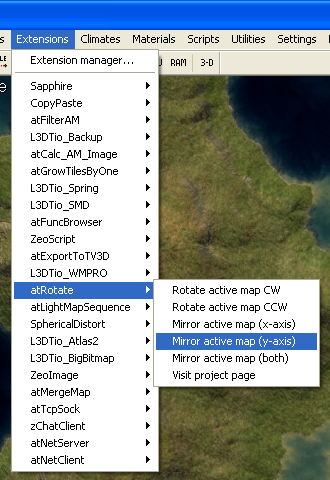
For various technical and historical reasons, L3DT uses an image coordinate space that is 'upside-down' relative to Blender. This means we have to flip the texture before exporting it. To do this, use the 'View→Show map' menu option to select the texture, and then use the 'Extensions→atRotate→Mirror active map (y-axis)' menu option:
This will flip the map in the vertical axis, ready for export to Blender. 5. Exporting the texture mapSelect 'File→Export map' in the menu again:
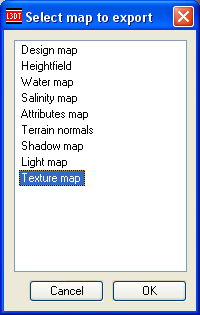
In the 'select map' dialog box, select 'Texture map':
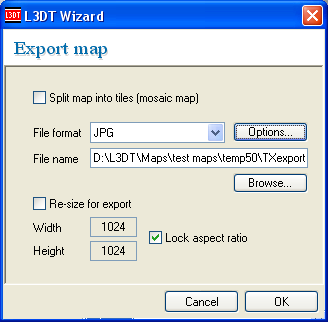
In the 'export map' wizard, select the 'JPG' format, and enter your filename (or use the 'browse' button):
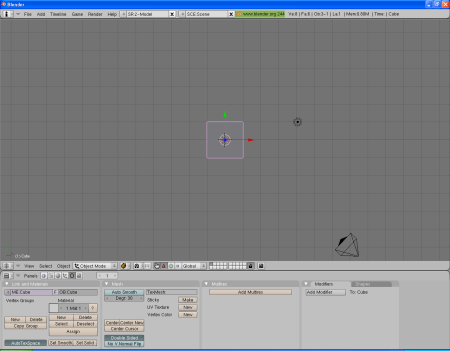
Click OK and the texture will be exported. 6. Importing the OBJ file into BlenderWhen you open Blender, it should look like this:
The first thing to do is to press the 'x' key, to delete the default box in the middle of the scene. Blender will ask you to confirm the delete (as below). Press OK.
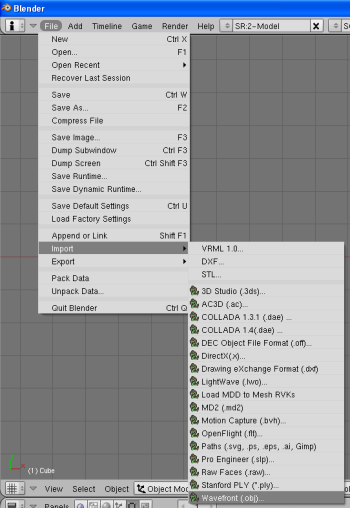
Now we want to import the OBJ file. To do this, select the 'File→Import→Wavefront OBJ' menu option:
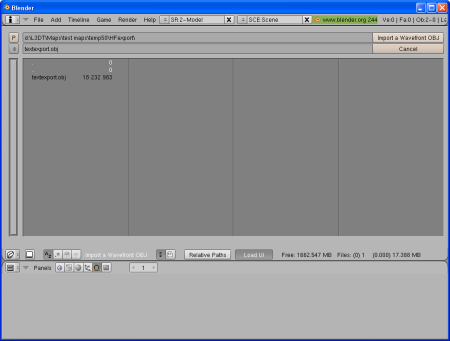
Now, select the file and press the 'import a Wavefront OBJ' (at top right):
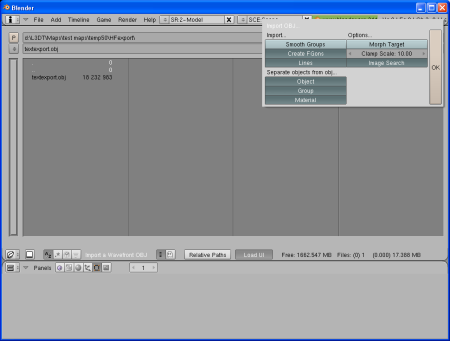
After pressing 'import a Wavefront OBJ', you will be presented with some import options (see below). You don't need to change these, so press OK.
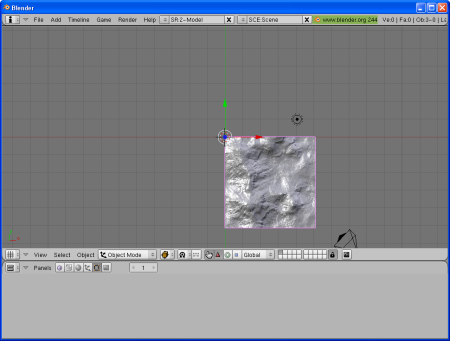
Once you click OK, Blender will import the terrain OBJ:
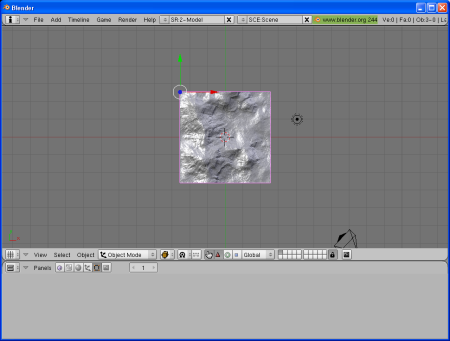
To center the terrain, press the 'g' key and move the mouse until the terrain is centred:
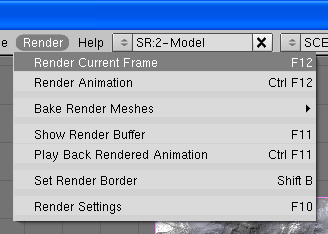
To check that everything is OK, you may now want to use the 'Render→Render current frame' menu option:
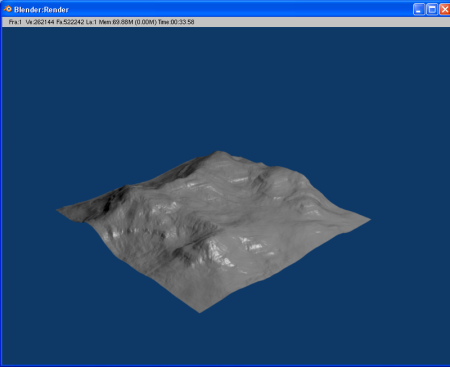
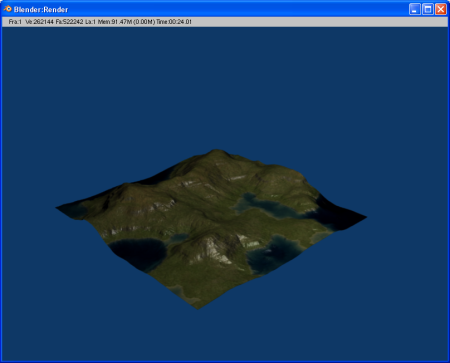
This option will open Blender's renderer window, which will eventually show something like this:
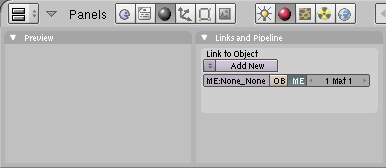
That's it for the OBJ import. 7. Importing the texture JPG into BlenderTo render the terrain with a texture in Blender, we must first create a material. To do this, press the 'F5' key to open the materials panel (as shown below). Note: you may need to bash the F5 key a few times to get it to show the right panel.
In the 'links and pipeline' area, press the 'add new' button to create a new material. This will open the full material panel (see below). In the far-right 'texture' area, press the 'add new' button to add a texture to the material.
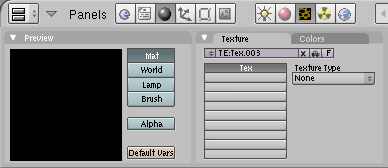
Now press F6 to open the 'texture' panel (see below).
In the 'texture' area, set the 'texture type' to image. This will open the full texture panel (shown below). In the 'image' area, press the 'load' button, and select the texture image your exported from L3DT earlier.
Once the texture image is loaded properly, the texture panel in Blender should look like this:
If you've got this far, then everything should ready for rendering. Select the 'Render→Render current frame' option to open Blender's renderer window, which should show something like this:
You may now want to tinker with Blender's camera position, or adjust the lighting settings. I have no idea how to do that, so I suggest you consult Blender's Getting Started guide. I hope this has helped. Back to tutorial index Except where otherwise noted, content on this wiki is licensed under the following license:CC Attribution-Share Alike 3.0 Unported
|

