|
Table of Contents
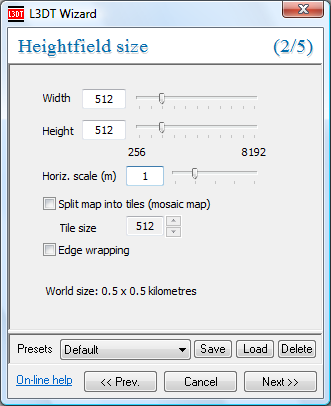
Part 1: Building the basic terrainBefore we get to the fun road-building part, we must first make some basic terrain onto which we may build our road. This section of the tutorial explains how to create a basic heightfield in L3DT (jump) or import it from another program (jump). This section will only briefly describe the terrain generation process, and won't explain many of the settings. If you'd like to know how to get the terrain to look exactly how you'd like it, please refer to the other tutorials. I recommend in particular the fjord tutorial, as this explains how to use the design map to 'design' your terrain map. Generating the heightfield in L3DTTo make a basic heightmap in L3DT, select the 'File→New project' option in the menu, and select the 'Designable map' option in the terrain algorithms wizard. This will bring you to the heightfield size wizard pane, shown below.
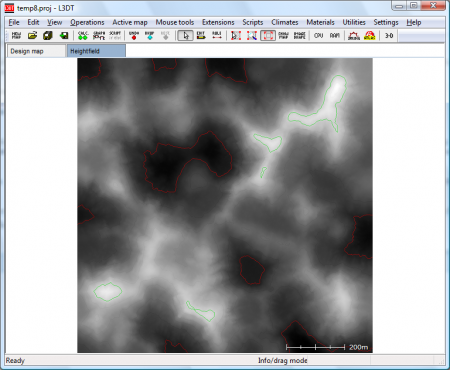
For the purposes of this tutorial, I recommend you make only a small heightmap (512×512 pixels), as this will make everything quicker and easier. Please feel free to make a larger map if you like, but be aware that the larger the map is, the longer it will take to run the map calculations. The settings I recommend are a heightfield map size of 512×512 pixels, and a horizontal scale to 1m. These are reasonable settings for FPS-style terrain. After the heightfield size wizard, you may leave the design map size and design map parameters wizards with their default settings, and then selected both the 'design map' and 'heightfield' options in the calculation queue wizard, and click OK. After the design map and heightfield calculations are complete, you should be left looking at a heightfield much like this one:
Importing the heightfield from another programIf you would rather generate your basic heightfield in another program, you can import it into L3DT using the 'File→Import→Heightfield' menu item. The import options are described in the user guide, but if you run into trouble, please feel free to ask for help in the support forum. Please note that depending on which program created your heightmap, and also your choice of heightmap file formats, you may have to change the horizontal and vertical scale of your map to stretch it into the right shape. For help on this, please see the user guide.
As always, I would strongly advise users to avoid using image formats to store heightfields (see this forum post).
Editing terrainIn this tutorial I won't do any manual editing of the terrain besides that needed to make the road. However, if you want to do some mountain-building, smoothing or roughening, now is the time. To do this, select the 'Operations→Heightfield→Edit in 3D' menu option. The controls of the Sapphire heightfield editor are described in the user guide.
Except where otherwise noted, content on this wiki is licensed under the following license:CC Attribution-Share Alike 3.0 Unported
|


