Light map operations
Generating the light map
The light map is made by selecting the 'Operations→Light map→Generate map' option in the menu. This option will open the light mapping wizard (discussed next).
For more info on how the light mapping algorithm works, see the algorithms page.
The 'Light mapping' wizard
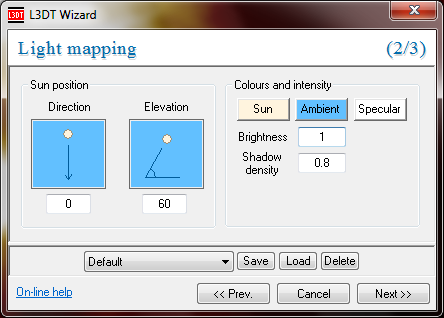
The Light mapping wizard consists of 3 panes, the first of which is:
The controls should, hopefully, be quite intuitive. A few things of note:
- Brightness - if the light map is too bright, turn this down. If it's not bright enough, turn this up. Values larger than 1 are permitted, but may cause saturation.
- Sun / Ambient ratio defines how bright the sun (direct) light is to the ambient (diffuse) light. This effectively sets how dark shadows will be.
- The Sun direction angle is in the clockwise direction.
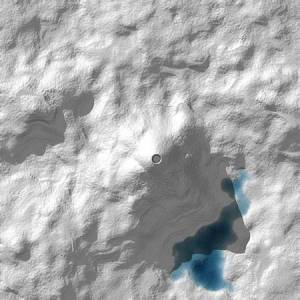
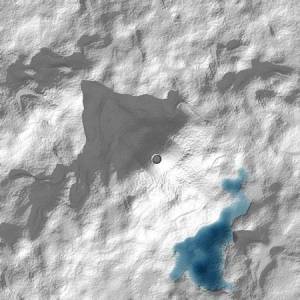
Here is some example output, using two different sun-directions:
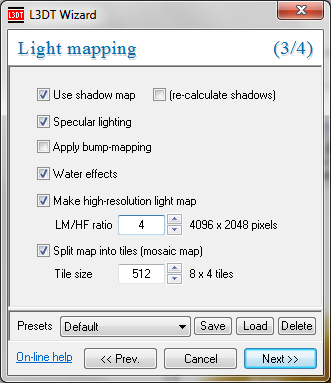
When you click on the 'Next »' button, you will be taken to the 2nd lightmapping pane:
Things to note here are:
- The Use shadow map checkbox determines whether the terrain will shadow itself. This is not required when the sun elevation is high in the sky, but looks cool when it is low in the sky.
- The Apply bump-mapping check box enables land-type bump-mapping, which provides additional detail in the light map (only available in L3DT Professional). This works best with high-resolution light-maps of 8× size or greater1).
- If you select the Water effects check box, the underwater parts of the lightmap will be affected by absorption and refraction, which is controlled in the next pane of this wizard (see light absorption by water, below).
- The Make high-resolution light map option, which is also only available in L3DT Professional, allows you to make more detailed lightmaps (discussed here).
- The Split map into tiles (mosaic map) checkbox lets you split the map into a set of smaller tiled images. This is probably a good idea if you're making a large high-res lightmap, as it won't hog so much RAM.
Light absorption by water
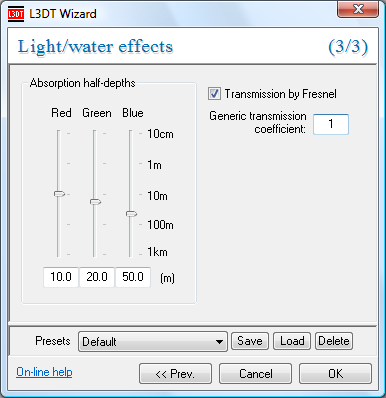
L3DT can calculate the colour and intensity of the light that reaches the bottom of lakes / seas using some good-ol' undergraduate physics (see algorithms page). Using the light/water effects wizard (below), you can set the absorption half-depths for red, green and blue light respectively. You can also enable (or disable) use of the Fresnel transmission coefficients, which give true elevation angle dependency. A 'generic transmission coefficient' is provided to allow for surface scattering losses.
