|
Table of Contents
Making the metal mapThe metal map can be one of the deciding factors of whether your map is “teh pwnz0rz” or “teh sux0rz”1). There are two methods that I use for making the metal map; one is very easy but offers little control over metal amounts, whereas the other is more time consuming but extremely easy to control. I will start with my favorite method which is a little more time consuming. In photoshop use the image size/scale function to scale your map (complete with the patch textures you added) to the same size as your heightmap will be. In my case on canyons, this is 1025×1025 (16×16 map size). Metal Map Method #1(Time consuming but easier to control overall) Now, flatten the texture image so that it is on one layer. Create a new image with the size constraints of 1025 x 1025, make sure the background is flat black. Now switch back to the resized texture image. Use the selection marquee to select and copy the entire image. Now switch back to your new image. Press CTRL+V to paste the texture on top of black image. Now, move the black layer up so that it is on top of the texture layer. Now use the blending options and set the black layer to around 30% opacity so that you can see the metal textures on your map. Now click on the brush tool and change it to the pencil tool. Make sure that the pencil tool is set to 6 pixels, not anti-aliased, 100% opacity and red 255 color. Now just click everywhere that there is a metal texture. Change the opacity of the black layer back to 100% and save the file as metal.bmp. Close both of the images. DO NOT SAVE THE TEXTURE IMAGE! Unless you're a glutton for punishment that is…
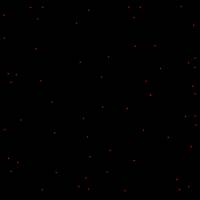
Metal Map Method #2(Easy and quick, a little hard to control metal amounts though) In the psd texture file, click the little eye beside the texture layer so that only the metal textures show. Now, merge all of the metal texture layers so that it becomes one layer. Use the blending options to put a color overlay of red 255. All the metal textures will be plain red now. Add a new fill layer that is solid black and make sure that it is behind the metal texture layer. Use the image size function to resize the image to the size that your metal map should be (in my case, 1025 x 1025). Save the file as metal.bmp. Here is what my metal map looks like: Before you ask; yes, it is meant to be that black. Click on the image to see the dots. You are now about 46% done. Next section1)
Congratulations! First use of l33t-speak in this wiki!
Except where otherwise noted, content on this wiki is licensed under the following license:CC Attribution-Share Alike 3.0 Unported
|

