|
Table of Contents
Making the texture mapNow you get to do the fun part; making the texture. Click on operations and generate the texture map. When the box comes up, uncheck “Use light map” and check the box that says “Make high resolution texture” then hit OK.
The texture should only take 5 mins give or take. After it is done, keep in mind that the texture might look a little bland in 2d and without shadows on it, but that's fine. It doesn't matter how it looks in 2d, only 3d. Ok, if you're real impatient at this point, you may save the map and use the L3DT 3d viewer (L3TDVi2) to view it. It is included in the L3DT installation package, but you can also download it here. Keep in mind that the 3d viewer is kinda sucky1), but, if you just need a preview it will work great. Click file, export – current map and save the texture map as terrain.bmp. Post-processing the textureOpen it up in photoshop. Now, in a separate image editor (I use Irfanview for this) Load up your heightbig.bmp.
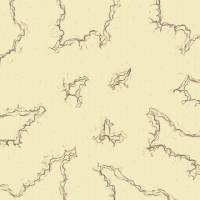
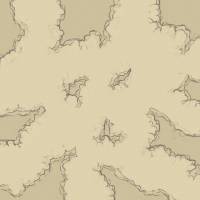
If you're using Irfanview then click image – negative. This will basically flip the colors on your heightmap. Save it as heightbig-negative.bmp Now, switch over to photoshop, open up the negative heightmap, use your selection marquee to select the entire thing. Hit CTRL+C then flip over to your texture map image, and press CTRL+V. Your negative heightmap image will be on top of your terrain map image. Now, use the blending tools in photoshop and change the opacity of the heightfiled layer to whatever looks good, 11% usually works quite nicely for me. This is an optional step, but it will make your map look much nicer in the long run, so I suggest doing it. Here is before I did the heightfield overlay… …and then after on Canyons:
Placing metal patchesNow in photoshop, click the layer option at the top, and flatten the image. Now you get to do metal placement. Keep in mind that this is only visual (at the moment), but the exact placement that you use for the metal patches will be THE EXACT SIZE AND SHAPE OF THE METAL PATCH IN GAME. You can use the metal patch textures that I suggest below, or you can make your own, or you can use others that other people have provided as well. Metal patch textures I suggest: Place the textures where you want your metal to be, and then save your map in photoshop as terrain.psd AND as terrain.bmp. The reason for saving both files is because if you realize later that you totally screwed the pooch when placing metal you can always go back and do it again without too much trouble. Ok, your done with the texture map. You are now close to 30% done with your map. Next sectionExcept where otherwise noted, content on this wiki is licensed under the following license:CC Attribution-Share Alike 3.0 Unported
|


