|
Table of Contents
Making a ski run in L3DT
L3DT user 'METEMEDO' asked in the forum whether it was possible to make a downhill snowy map for a snowboarding game. Possible? Yes. Easy? Not so much. The best process I could think up still involved an outrageous amount of manual editing, but, for what it's worth, I have documented it here in this tutorial. AudienceThis tutorial is intended for intermediate L3DT users. Beginners should first familiarise themselves with the design map brush, design map effects, the 3D heightfield tools, and running all map calculations (attributes, light, texture, etc.). A good entry-level tutorial that covers much of this is the fjord tutorial. Required toolsThis tutorial only requires a recent version of L3DT Professional. In making the map that is the subject of this tutorial, I have used the latest version of L3DT Professional, which was v12.02 developmental build 2. You should be able to repeat all steps using L3DT Pro v11.11 or v11.08, but probably not with older versions. If you are using the free Standard Edition, most steps will work, but you won't be able to use the 'DM_SlopeOverlay' graph, as SE does not support filter graphs. You will be able to work around this limitation by using the design map brush instead, but it will be a little more tedious. DisclaimerIn this tutorial I attempt to make a map suitable for snowboarding games. Now, I have never played a snowboarding game, never snowboarded myself, nor watched snowboarding on TV in any quantity greater than 'passing'. Consequently, I have little idea of exactly what features are desirable or realistic for a snowboarding course, and thus can make no guarantees that the final map will be suitable for snowboarding games. However, the methods used in this tutorial will nonetheless be applicable to making snowboarding course maps. You can judge for yourself whether the output is up to snuff:
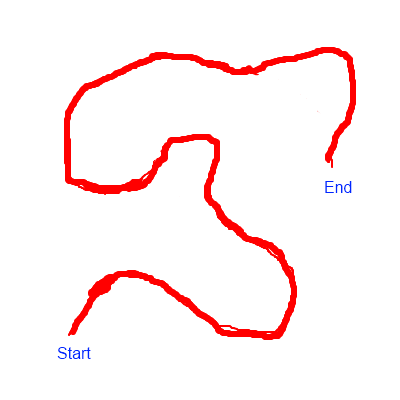
Drawing a rough sketchThe first step in making a ski run map would be to sketch a rough plan for the course in an image editor like MS Paint. Here is the one I used:
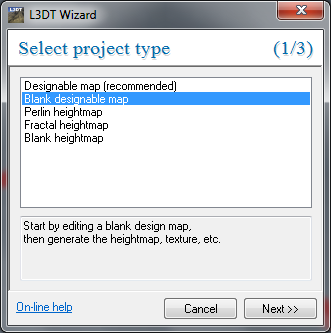
Please note that the design does not need to be square. Creating the projectThe starting point in L3DT is to select the 'File→New project' menu option, and select the 'blank designable map' option in the Select project type wizard:
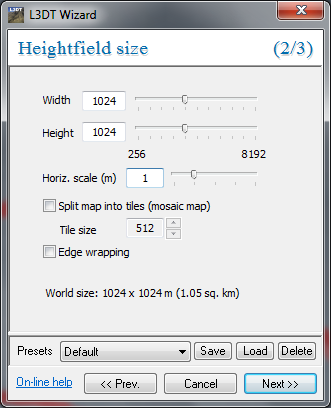
Next, in the heightfield size wizard pane you will need to decide on the size of your map, and what horizontal scale you'll use (How to choose the right horizontal scale?) For games where the camera is close to the terrain surface, such as a snowboarding game, you generally need to use a horizontal scale of 1m or smaller (I used 1m). With this resolution, and a few switchbacks, you can cram about 1.5-2km of course into a 1024×1024 pixel heightfield. You’ll need to increase the map size if you want a longer ski run, or if you want a good depth of scenery around the run to hide the edges. If you want more detailed terrain than I have generated, you can decrease the horizontal scale (e.g. to 0.5m), and then increase the heightfield size to compensate (to 2048×2048). Anyway, the heightfield size wizard settings I used were:
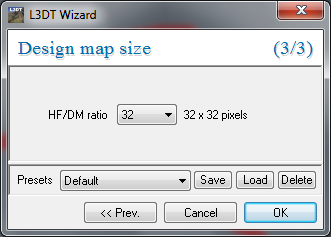
The next pane in the wizard is for design map resolution. I’d recommend a design map resolution of 32x, as it should give you the finer-grained control over the design that you’ll need for making this type of project.
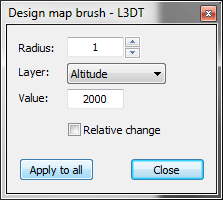
Once you click OK in the wizard, L3DT should then show you an empty design map, which should look like a black square with some dots on it. Altitude, slope and climateA blank design map starts with an altitude of 0m everywhere, which means the whole map is at sea level. This is not ideal for an alpine map, so you should provide some altitude offset to the terrain. To do this, click on either the 'Tools→Design map brush' menu option or the 'edit' toolbar button to launch the design map brush. In the brush window, type in an altitude of, say, 2000, and press the apply to all button, as shown below:
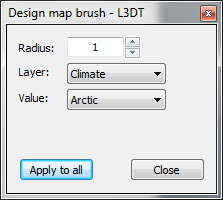
Also, select the 'climate' option from the layer dropdown list, then select the 'arctic' option from the value dropdown list (shown below), and again press the apply to all button.
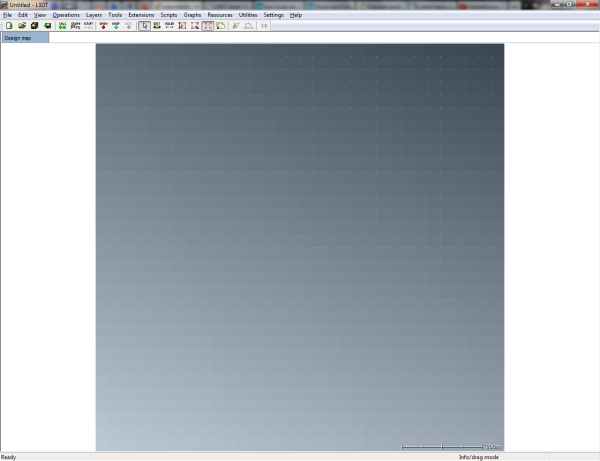
Next I used the 'Graphs→DM_SlopeOverlay' menu option to apply a uniform downwards slope to the design map, running in the direction from the start to the finish points. This step will save you from having to build the entire slope manually, which I found to be more than a little tiresome. For this map I used a slope angle of -30 degrees, and a slope heading of 20 degrees. These settings resulted in the design map looking a little something like this:
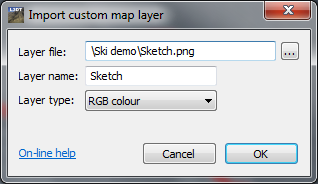
Image drape and display schemeLoad the sketch image into your project using the 'Import→Import custom map layer' menu option. In the import custom map layer window, select the 'RGB colour' option from the Layer type dropdown list.
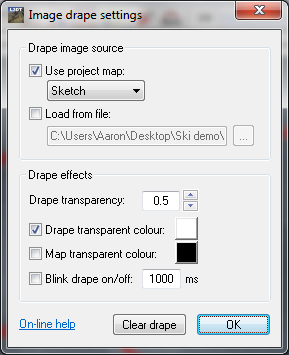
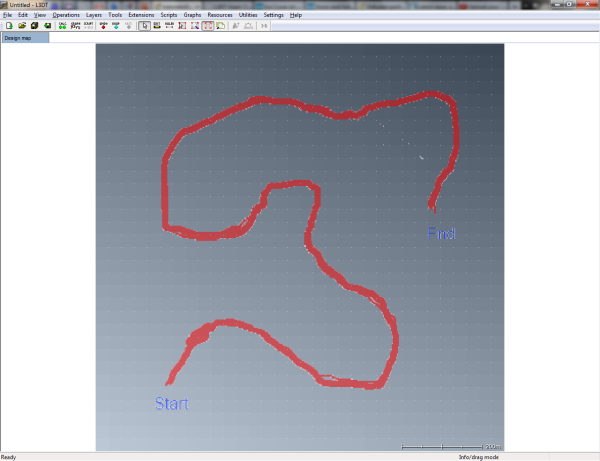
Use the 'View→Image drape' menu option to open the Image drape settings window. Select your imported sketch image from the project map dropdown list, and set the drape transparency colour to the background colour of your image.
The display should then look something like:
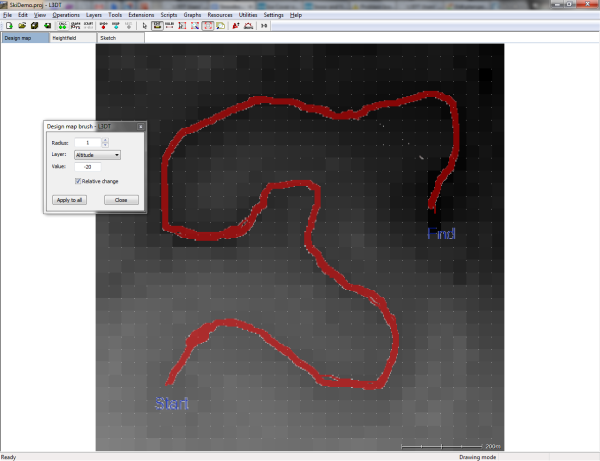
Finally, select the 'View→Display effects→Design map schemes' menu option to open the design map schemes window. Select the 'AltEdit' scheme, which is a greyscale scheme that is best when the altitude layer of the design map. We're now ready to start editing. Making the ski runThis is the part where you may be hoping that L3DT has some nice tool for automatically carving a continuous downhill slope when given a path to follow. Alas, it does not. Instead, you'll have to do it manually. Worse still, you have to be precise, since every step in the path must be a consistently small amount lower than the preceding step. You will soon agree that this is the really boring part. Starting at the start, double-click on each design map pixel along the path of your course to bring up the edit design map pixel window. Edit the altitude value to ensure that each pixel is between, say, 0 and 20m lower than the pixel before it.
Since we set the horizontal scale to 1m per pixel, and we selected a design map resolution of 32x, each design map pixel represents 32×32 metres. We can use this to calculate the slope angle for various changes in altitude between pixels:
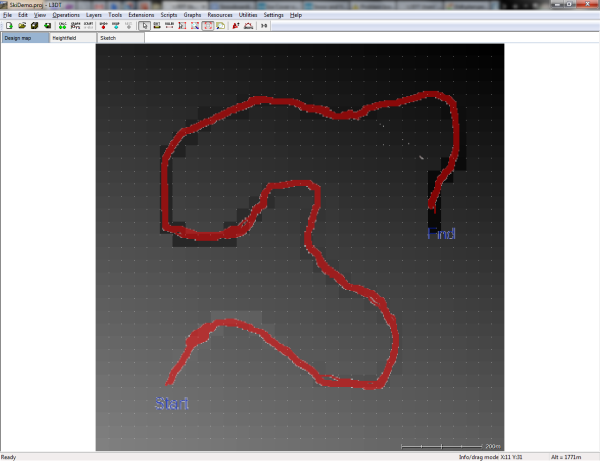
After what may seem like an eternity, but in reality more like ~15 minutes, the result should look something like this:
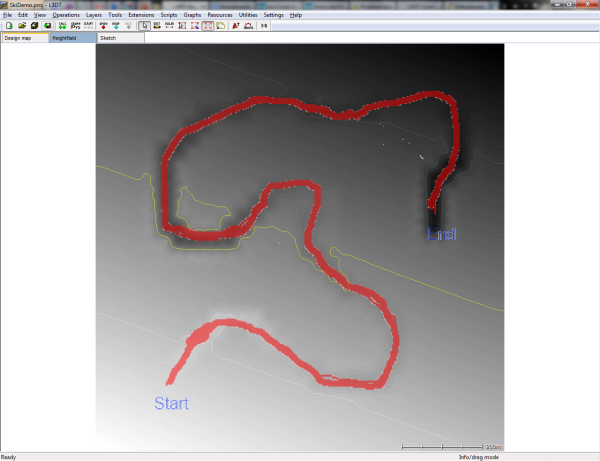
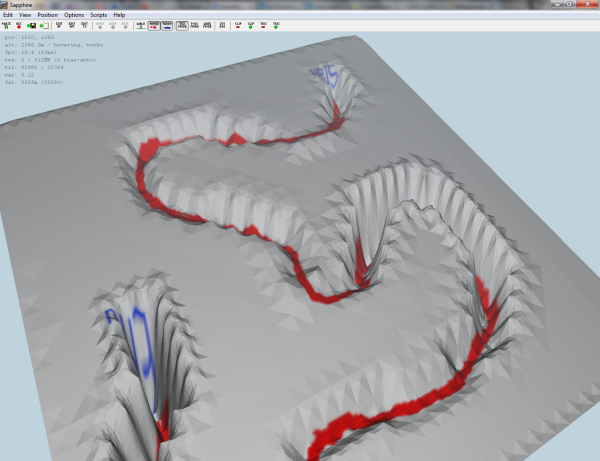
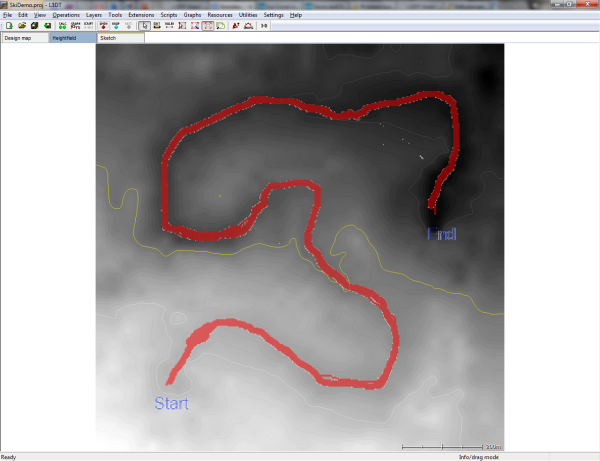
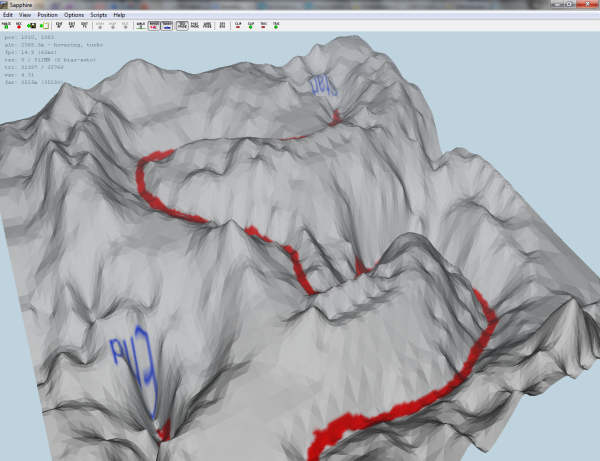
Note how I have only edited the pixels directly under the path. We'll do the surrounding pixels later using the design map brush tool, as they don't need to be as precisely set as the pixels in the path. At this stage you can generate the heightfield to check the results. If you do this, you should get something like this: You can also view the heightfield in the Sapphire 3D viewer using the '3-D' toolbar button. To help visualise the path, select the 'Options→Terrain→Select texture' menu option, and choose the sketch map layer you imported earlier. Also, enable the 'Options→Polygon lighting over texture' menu option. The result should look something like this:
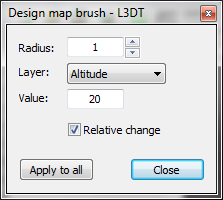
It's not very pretty yet, but it will give you some idea of the distances and slopes in the areas surrounding the course, which we'll fill in next. Making the surroundsNow we will add some height to the pixels on either side of the course to prevent snowboarders from falling off the intended path. To do this, select the 'Tools→Design map brush' menu option in L3DT to re-open the design map brush window. Set the radius value to something small (e.g. 1), the altitude to 20, and enable the 'relative change' checkbox.
With relative change enabled, the terrain under the brush will be raised by the amount given in the value edit box each time you click or drag the mouse. With relative change disabled, the height of the pixel will be set to the altitude given in the value edit box.
Click and drag (or just click, move, and click) the brush tool over areas of the map that need to be raised, such as the edge of the track. To lower terrain, set the altitude in the value text box to a negative value (e.g. -20). Be careful not to draw over the track pixels themselves, but if you do, use CTRL-Z to undo the last edit. It is important when editing the design map to make sure that the height difference between neighbouring pixels is not too large, as this would produce unnaturally steep terrain. This is particularly necessary when making small-scale terrain such as this map. For example, on this map, a difference in altitude between two pixels of only 100m would produce a 72 degree slope (3 in 1), which is very steep indeed. I tried to keep the altitude differences between neighbouring pixels to 50m or less ( = 60 degree slope).
To find the altitude of a pixel in the design map, hover the mouse cursor over the pixel and look at the 'alt' value in the status bar, which is located at the bottom right of the main window.
Anyway, after a few minutes of carving terrain with the design map brush, I came up with this:
Note how, in general, the change in greyscale level between pixels is low, and the gradients are smooth. This is what you need to aim for, because L3DT will follow your design very closely when generating the heightfield. L3DT only knows what the design map says, not what you meant by it. Anyhoo, the heightfield now looks like:
…and in 3D, like:
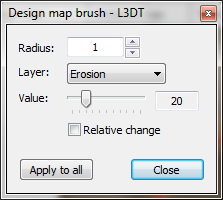
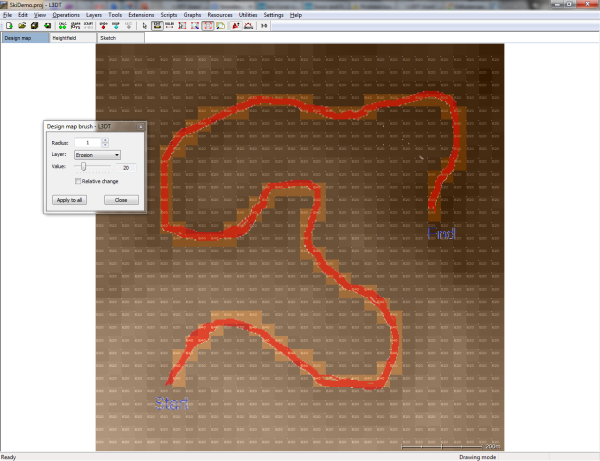
As a rough sketch, that's not too bad. A bit lumpy perhaps, but the general shape is OK. We will now proceed to apply more advanced heightfield effects to make the course smoother, and make the surrounding terrain more natural in appearance. Erosion and other effectsTo make the terrain look less lumpy, we're going to use the design map brush to apply a modest level of erosion over the whole map. To do this, select the 'erosion' option from the layer dropdown list, disable the relative change checkbox, move the slider to 20%, and press the apply to all button.
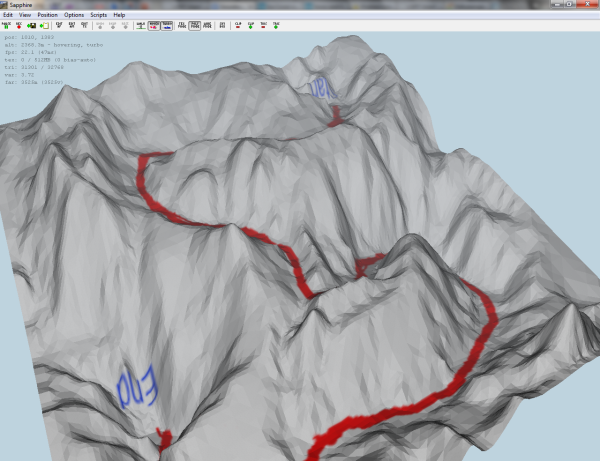
One requirement of the snowboarding course is that the snow is smooth. To achieve this, set the erosion slider to 40%, the radius to 1, and click and drag the brush over the snowboarding course. The results should look something like this:
Now, when we generate the heightfield and view it in 3D, we get this:
That's starting to look OK. You could, and probably should, go further and apply extra erosion on some of the off-track terrain, along with some peak and fractal noise, and even cliffs/terraces. Please use restraint however, as the effect of some of these overlays will spill over onto neighbouring pixels if high effect strengths are used, and you should avoid this occurring with the on-course pixels if possible. Anyway, I shall go no further into the subject of using other effects other than to point you in the direction of this page, which explains the effects of the various design map effects, more or less. TuningOkay, now it's time to see how the course will look from a snowboarder's perspective:
There were a few problems here:
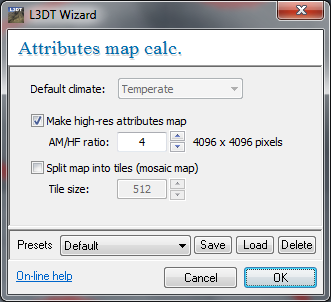
To fix these problems (the first two, at least), I went back and edited the design map to tweak the relevant pixel heights. If you find it's too inconvenient to use the design map brush, you can at this stage start to use the 3D heightfield editor brushes in the 3D viewer. Generating the attributes map, texture, etc.Okie dokie. By now you should have the heightmap pretty much sorted, so we can go on to generate the textures and whatnot. If you want to generate a water map with lakes and such, you should go away and do that now. I do not, so I will skip over that step. We should now generate the attributes map, using the 'Operations→Attributes map→Generate map' menu option. In the attributes map wizard, I selected a resolution of 4x:
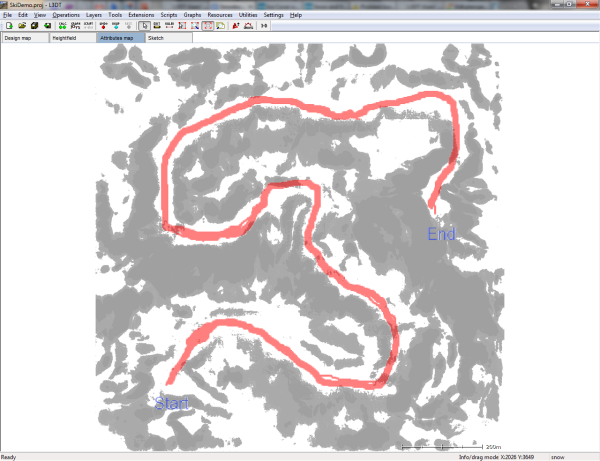
The result of that operation was:
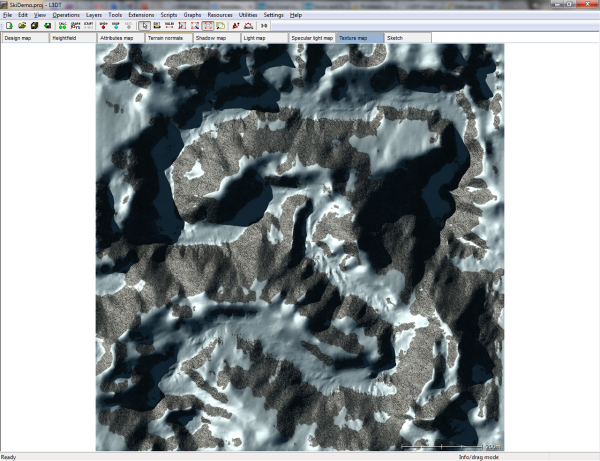
The attributes map looks about right to me. If you find in your map that parts of the course are blocked by rocks, it probably means you've made that section too steep, so you should go back and either edit the design map or the heightfield to reduce the steepness of the affected section. With the attributes map OK, you are ready use the 'Operations→Calculation wizard' menu option to open the calculation wizard. In this window, enable the normal map, light map and texture map options, and then follow the various wizard panes to enter the settings for these calculations. Once complete, and with the image drape turned off, the output texture map looked like:
Which, in 3D, seemed to be pretty good:
That is all. I hope this has helped. FeedbackPlease address all feedback to aaron@bundysoft.com. Except where otherwise noted, content on this wiki is licensed under the following license:CC Attribution-Share Alike 3.0 Unported
|

