|
Table of Contents
Climates and terrain typesBefore we go ahead to make the texture, we've got to deal with L3DT's climate system. You now need to re-open L3DT an import the heightmap again (using the 'File→Import→Heightfield'). You will have to set all the height settings and horizontal scaling again, since these aren't saved in bitmaps. I suggest that at first you import with the settings you plan to use in the compiler. Unfortunately I have to branch off into some excess information here before continuing. Generally maps with maximum altitude higher than 300 – 600 play quite badly. The reason for this is because even kbots have some serious issues with climbing hills that are higher than 300 meters. So keep this in mind while making your map. Yes, huge height scales look way cool, but as I said, they play quite badly. I suggest that (if your map has no water on it) you use a height scale of 100 – 400, and a horizontal scale of 4. If your map has water on it, I would suggest a scale of -100 – 200, horizontal scale of 4. Keep in mind that this is just the terrain render so if you need to you can massively cheat on this step to achieve the desired result. Okay, back to the climate stuff...OK, this is where it gets hard (but not so bad). As you may or may not know, L3DT applies apply textures depending on the slope, the height that it is at, and various other parameters. These settings are stored in climate files, which are fiendishly hard to understand. However, once you start messing with making your own, you start to see how your changes effect the map. This is also a good place to note that L3DT was designed to make pretty pictures of maps, not to make spring maps, so the texture map might end up looking a little bland, until you have compiled your map. Alternatively, after you have rendered your map in L3DT, you can save the map and use L3DT's viewer to view what it looks like in 3D. It's not perfect, but it will give you a really good idea on what you need to change to make it better.
Setting up a new climate for SpringChances are that you'll want to set up your own climate for your Spring maps. Here is one that Forboding Angel made earlier: The contents of the file are explained, somewhat, on the climate format page.
The climate file format used here has been deprecated. L3DT 2.4 uses a new format based on XML. L3DT also has a climate editor, so you don't have to edit the files manually. — aaron 2006/10/08 20:20
Anyhoo, download and save the file to the '[L3DT path]\resources\climates' folder, and save it without the .txt extension (that was added for wiki reasons). In the above file (which is a text file you can and should edit), the folders referenced are the folders inside '[L3DT path]\resources\textures', so what you need to do is put your individual textures in the corresponding folders. Your grass texture in the grass folder and etc. Then change the file names in the above file and name your climate at the top. Now, go back to L3DT, click on 'Options–>Climates→Register new climate'. It will take you to L3DT's climate folder and you should see your climate file there, select your file and hit ok. Now, keep in mind that this is AFTER you have imported the huge heightmap into L3DT, so now click on operations – design map. This will pop up the same dialog option that you saw when you were making the heightmap earlier. Don't worry about changing the sliders as they will have no purpose this time around, just change the climate being used, to your new climate. Now hit ok.
The 'Register new climate' has also been removed from v2.4. Use the climate manager instead.
Making the design map should only take a minute or two, if that. When the design map comes up you should see your map in a very pixellated view. The more red that an area is, the more likely that there will be rock there1). If it looks as though your terrain won't be the way you want it, you can click options – heightfield- change horizontal scale. Changing the horizontal scale is what makes L3DT be picky or not picky about slight changes in height. If you change this you will need to re-render the design map.
Generating the Attributes map
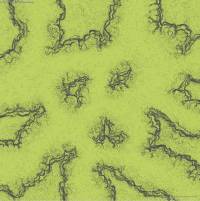
Next, click on the operations menu at the top, and this time generate the attributes map. This is the most time consuming process when rendering a map. The attributes map does all the terrain-type calculations in advance, so that generating the actual texture ('terrain', in Spring) takes only a few minutes. Calculating the attributes map will take about 10 – 20 minutes, maybe less depending on your machines power and how much RAM you have. After it is done, you can see very intimately where L3DT places the specific textures. Sometimes you will realize as you get more experienced, that you have set the horizontal scale too low (or the vertical scale too high) and L3DT is being way too picky for your tastes, which means you will have to recalculate the attributes map again after changing the scale (water map also!). Sometimes it can be a real pain to get it right so be patient, Rome wasn't made in a day. A rough idea of what my attributes map looked like: If you've got to this point, the hardest part is over. Congratulations! Next section1)
please refer to the design map schemes tutorial for a more…fulsome…explanation of this. — aaron 2006/03/10 06:38
Except where otherwise noted, content on this wiki is licensed under the following license:CC Attribution-Share Alike 3.0 Unported
|

